Showing posts with label DIY. Show all posts

Friday, 1 July 2016

DIY refurbished sweetheart mirror

Nothing, for me, beats the feeling of satisfaction that comes with finding a seriously good op- shop bargain. A few months ago, I was, not unusually, rummaging through one of the op- shops in my local area in the hopes I would stagger upon a hidden thrifty gem. Alas, moments later I found myself clutching a certain treasure in the form of an old sweetheart mirror. Not being able to resist temptation I, of course, made a bank breaking purchase of $12 and added this beauty to my dangerously accumulating and unfortunately stagnant collection of to-be-completed furniture. Months later, I've dilly-dallied around a bit and ended up with something I'm quite chuffed with. I decided to go with a pale bluey-green colour all over (not at all predictable) in the shade  'turquoise mist' by Taubmans. As much as I love this little sweetheart mirror, I see it being much more at home in a little girl's room or nursery and thus, I will be selling it in the coming weeks. 


Happy op -shopping! 


Zoë xx


0

Sunday, 18 January 2015

FRIENDS Peephole frame DIY

Hello everyone! If you're not already aware of my unhealthy obsession with Friends this weeks blog post will be sure to illustrate the extremity of it for you. I have wanted to make a replica of Monica's yellow peephole frame for a very long time now but I've never really had a cause. Basically, an opportunity presented itself and I, of course, seized it. I will admit it did take me a week to get to the final product. But don't fret more that 90% of it was waiting for the paper mache to dry.


To create Monica's peephole frame you will need:

  • newspaper
  • cheap paper towel
  • PVA glue 
  • water 
  • some old paint brushes
  • scissors
  • Yellow,brown and Gold paint (gold paint is optional, just use whatever works for you)

Step One:

Print out an A4 size version of the actual peephole frame to use as a template. I got my template here from www.intructables.com . Also this would be the point at which you put friends on to watch while creating your masterpiece. 

Step Two:

Mix some PVA glue with a small amount of water just to thin the glue a little bit so its easier to paint on. Lay out a sheet of newspaper and use and old paint brush to paint the PVA glue and water mixture all over the sheet. Then roll up the newspaper so that its about an inch thick. Layout your strips of rolled up newspaper ontop of the template so it resembles something like this:


You will have to leave this for a couple of days to completely dry out before you do the next step. Be patient otherwise all your hard-work so far will be for nothing. :)

Step Three:

Once your 'frame' has dried you're ready to paper mache over the top. The aim is to make the gaps appear filled in but apply the mache so it dips a little in the middle - this makes sure the swirls and outlines are still defined. You need some cheap paper towel - newspaper mache is probably too harsh. To start off layer together a few sheets of paper towel and drape it between sections of the frame. Build up the layers of paper mache until the entire frame is covered. Once your done your frame should look like this:


Leave this to dry out completely before doing the next step. If you want to speed up the drying process just use a hairdryer (but don't get too close haha).

Step Four:

You're ready to paint wooh! First paint the entire thing in a yellow as close to the original colour. Then go back in and add shading around the swirls and curves to add dimension. 


I used a mixture of gold, brown and yellow to shade. I like the gold because it gave a kind of bronzed effect. 


And this is your final product!


I super happy with how mine turned out and it was actually way easier to make that I thought it would be. Have fun creating your masterpiece!

Zoë xx

0

Sunday, 21 December 2014

DIY paper snowflakes

Hi everyone! Since the Christmas season has flown by and is quickly coming to a close, I though I would get a few Christmassy blog posts in before its over. I go a little crazy at Christmas time and cut about 50000000000 snowflakes out of paper. I don't mean to toot my own horn but my snowflake cutting skills are probably about the only spectacular skill I possess and today I thought I would teach you my ways. 


You want to start with a piece of paper that half the size of an A4 piece of paper. In other words cut a piece of A4 paper  in half.

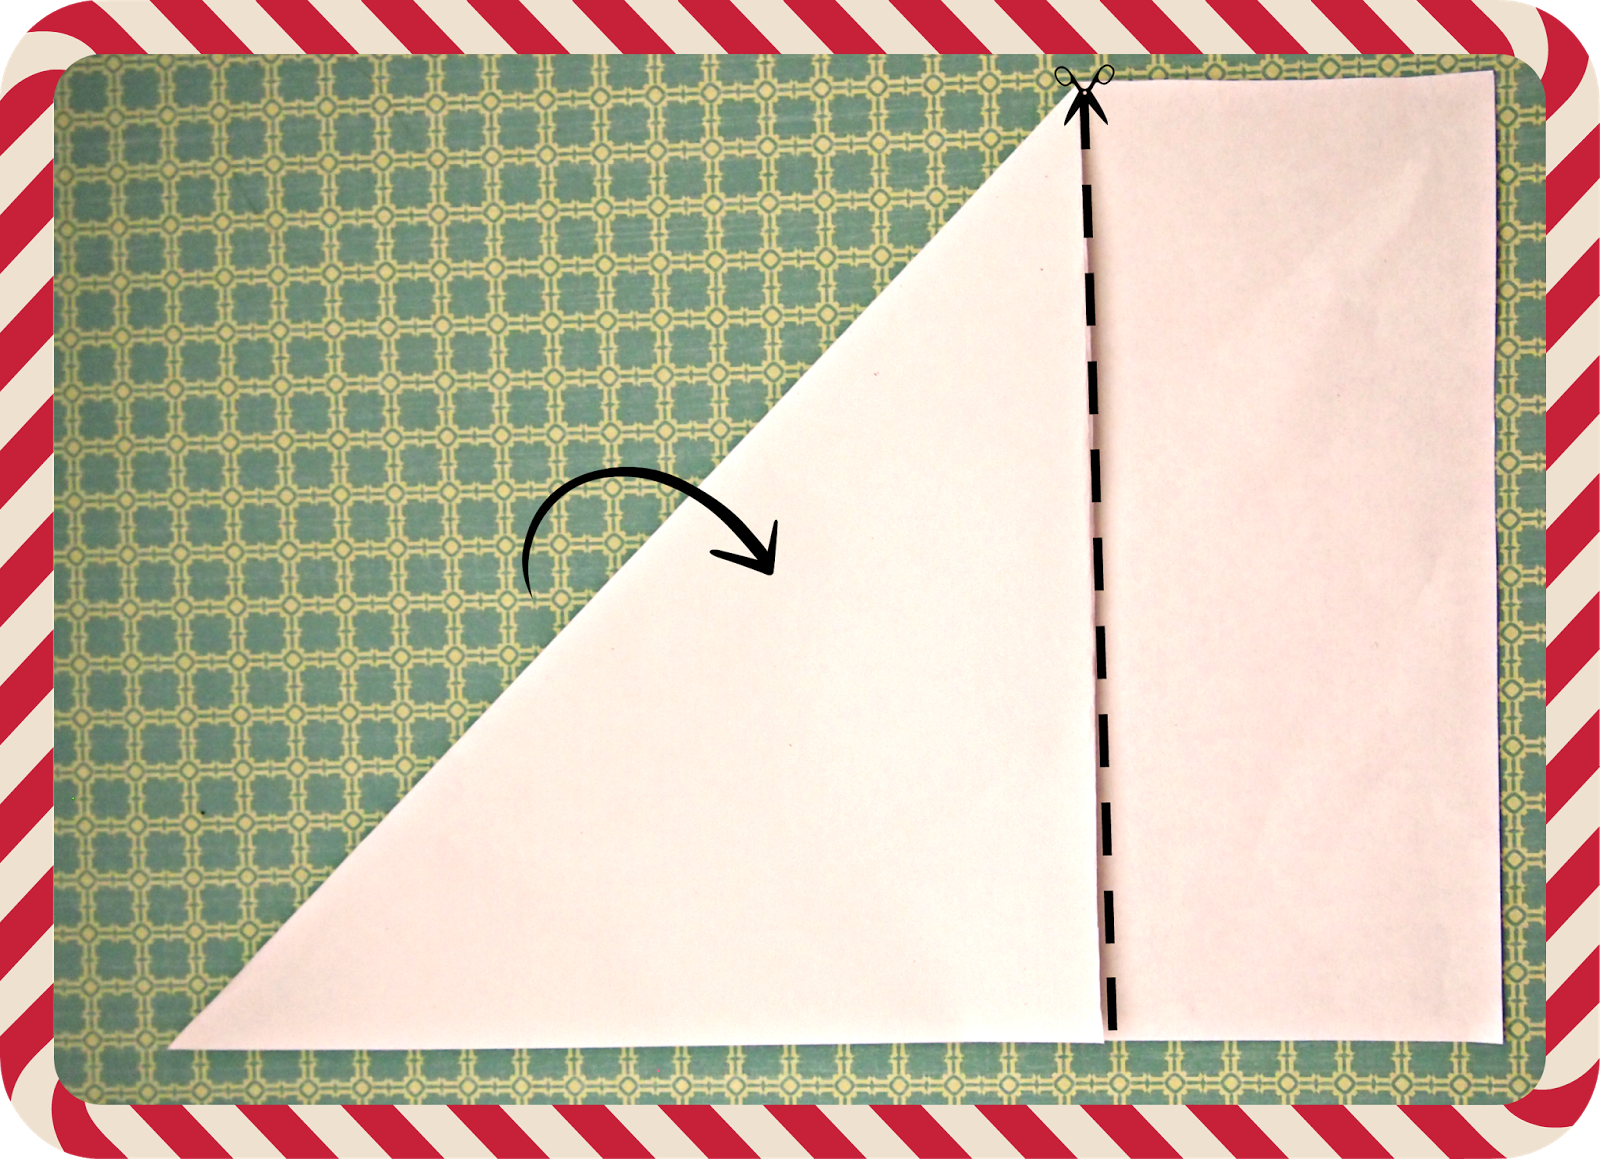
You then want to fold down the top half of the paper to form a triangle and cut off the excess paper at the bottom like in the picture above.

Once you've got your folded in half triangle, here comes the tricky bit, fold it in half again. 

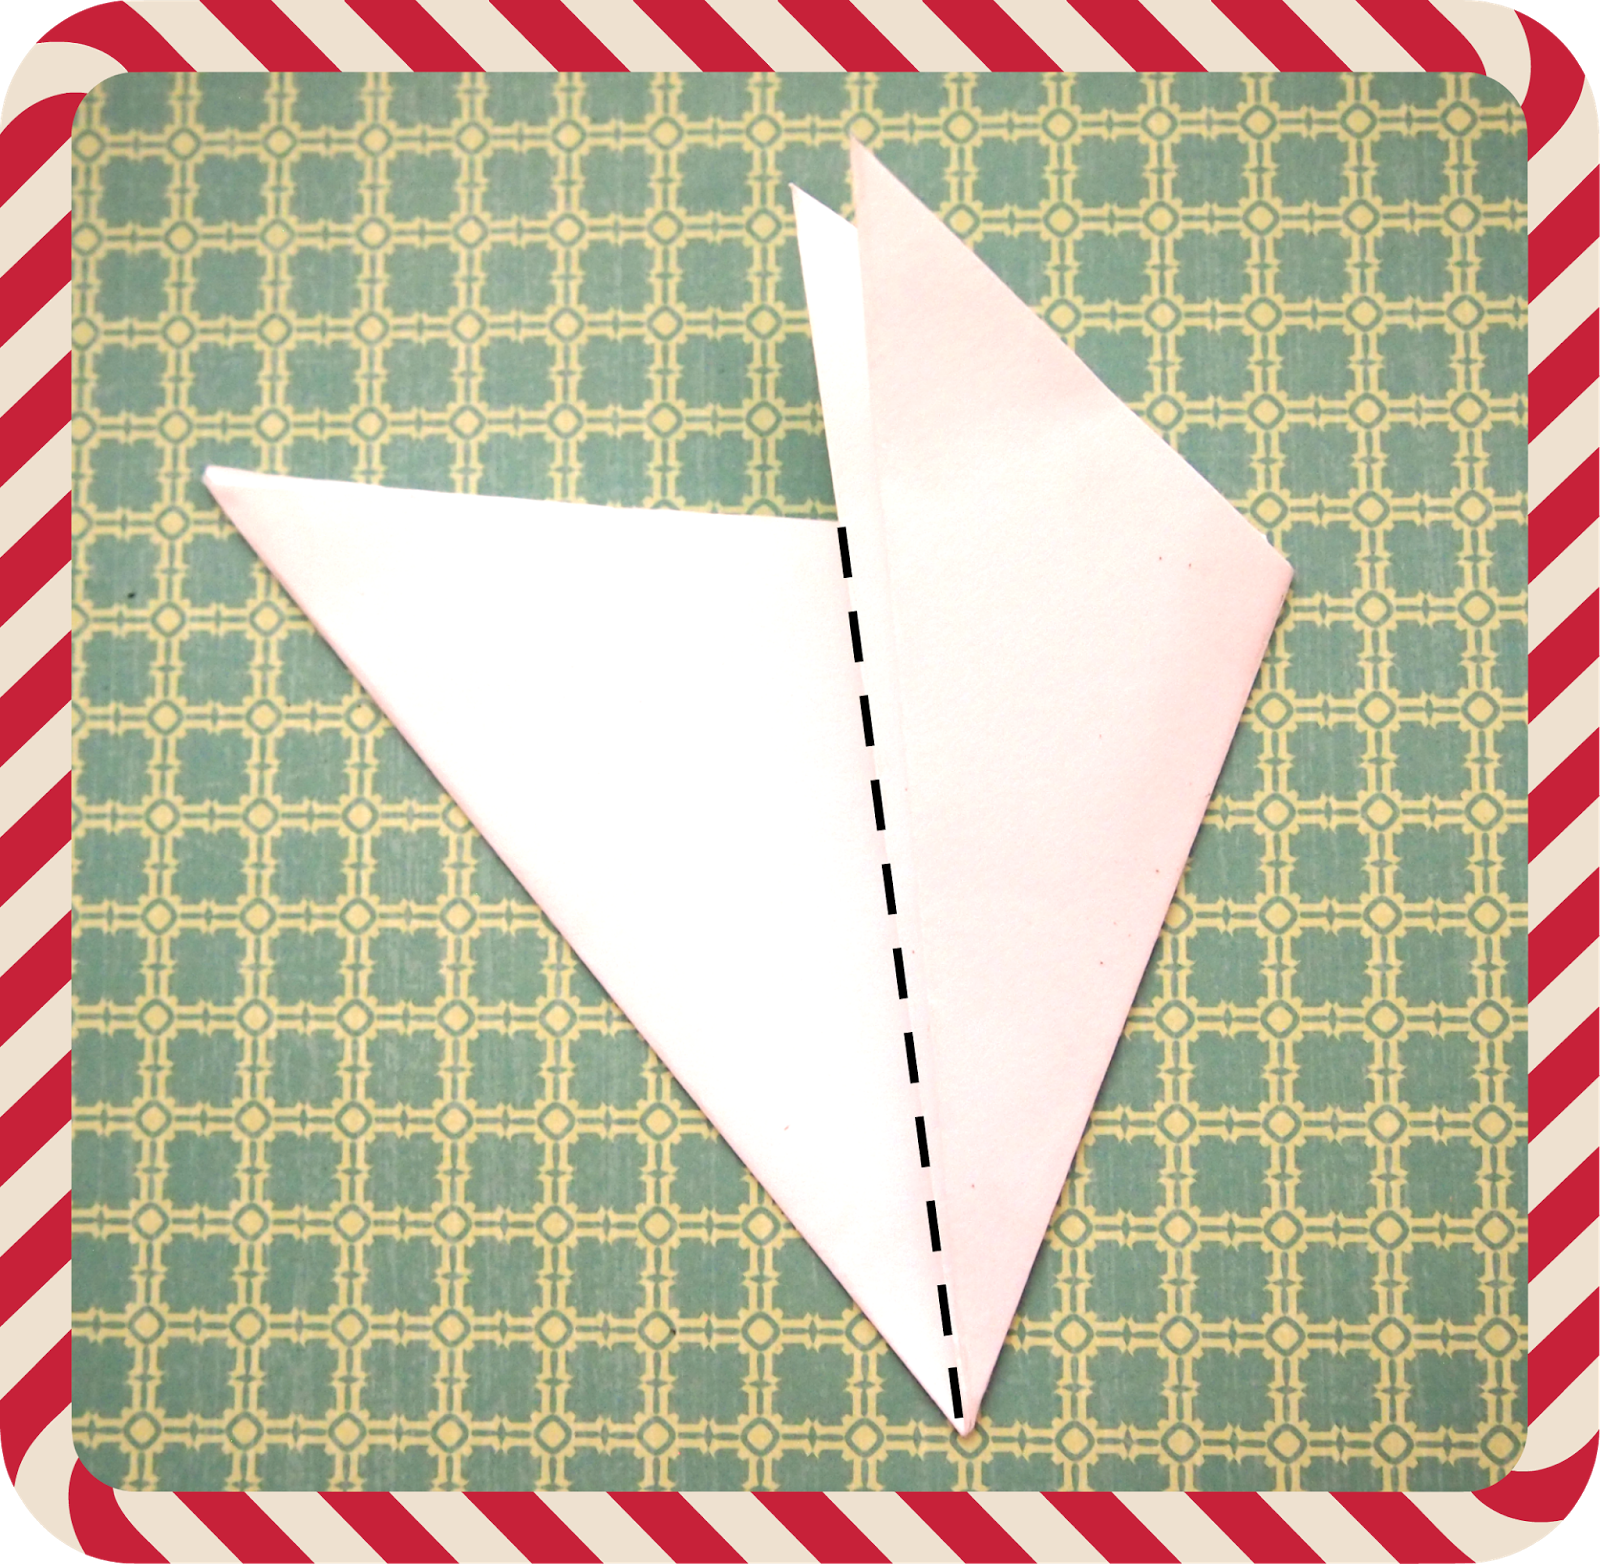
Now you should have a triangle that been folded in half twice. The next thing you want to do is fold that triangle into thirds, along the lines in the picture above.


Once you've folded the triangle into thirds, cut off the excess paper along the top (picture above) so you end up with a triangle shape (picture below). 

Now the fun bit,

From this triangle you can cut your design. When you cutting out your design make sure you don't cut straight across, obviously that will result in your snowflake being presented in separate little bits of paper and we don't want that. The design above is to create the snowflake at the top of the blog post.

Cut out the shaded areas shown above so you remain with the snowflake pattern below.


Fold it out and Tad-ah! You have created yourself a masterpiece.


Here are some more to get you inspired and coming up with some more crazy designs,


Merry Chistmas!

Zoë xo

0

Friday, 5 July 2013

DIY: paint chip art

Hey guys! Its been ages no excuses but were back so yay! It's Louise's birthday today so that's cool but I'm here to do a DIY. I know what your thinking most uncoordinated human being attempting a DIY, this is going to be a travesty but wait! just think of it a inspirational. Anyway to the point.

DIY paint chip art.


so here is what I managed to create purely from paint chips in the colours I wanted.


The first thing you need to do is get a whole variety of paint chips in your desired colour.

as you can see I went a little nuts with the paints chips and I didn't end up using them all but you do need quite a few.

the next thing I did was cut out a template I just used the trusty old cereal box. I cut it in the shape of a sort of slanted rectangle.

I then traced this shape onto my paint chips. To get the right pattern it is important to alternate the side you trace it on for example:


I then cut out all then shapes


gluing the shapes down onto paper is pretty straight forward you could glue them in any pattern you want. I chose to glue them down alternating direction. You can also ombre the colours starting with the darker shades at the top and gradually moving to the lighter shades at the bottom. I glued mine down like this with just a regular gluestick.


any glue marks I wiped off with a damp cloth. I prefer to glue mine down in random order because 
A) it's way easier and
B)it gives more contrast between the colours

and your done!!! hope you enjoy!


0