


Hi everyone! Since the Christmas season has flown by and is quickly coming to a close, I though I would get a few Christmassy blog posts in before its over. I go a little crazy at Christmas time and cut about 50000000000 snowflakes out of paper. I don't mean to toot my own horn but my snowflake cutting skills are probably about the only spectacular skill I possess and today I thought I would teach you my ways.

You want to start with a piece of paper that half the size of an A4 piece of paper. In other words cut a piece of A4 paper in half.
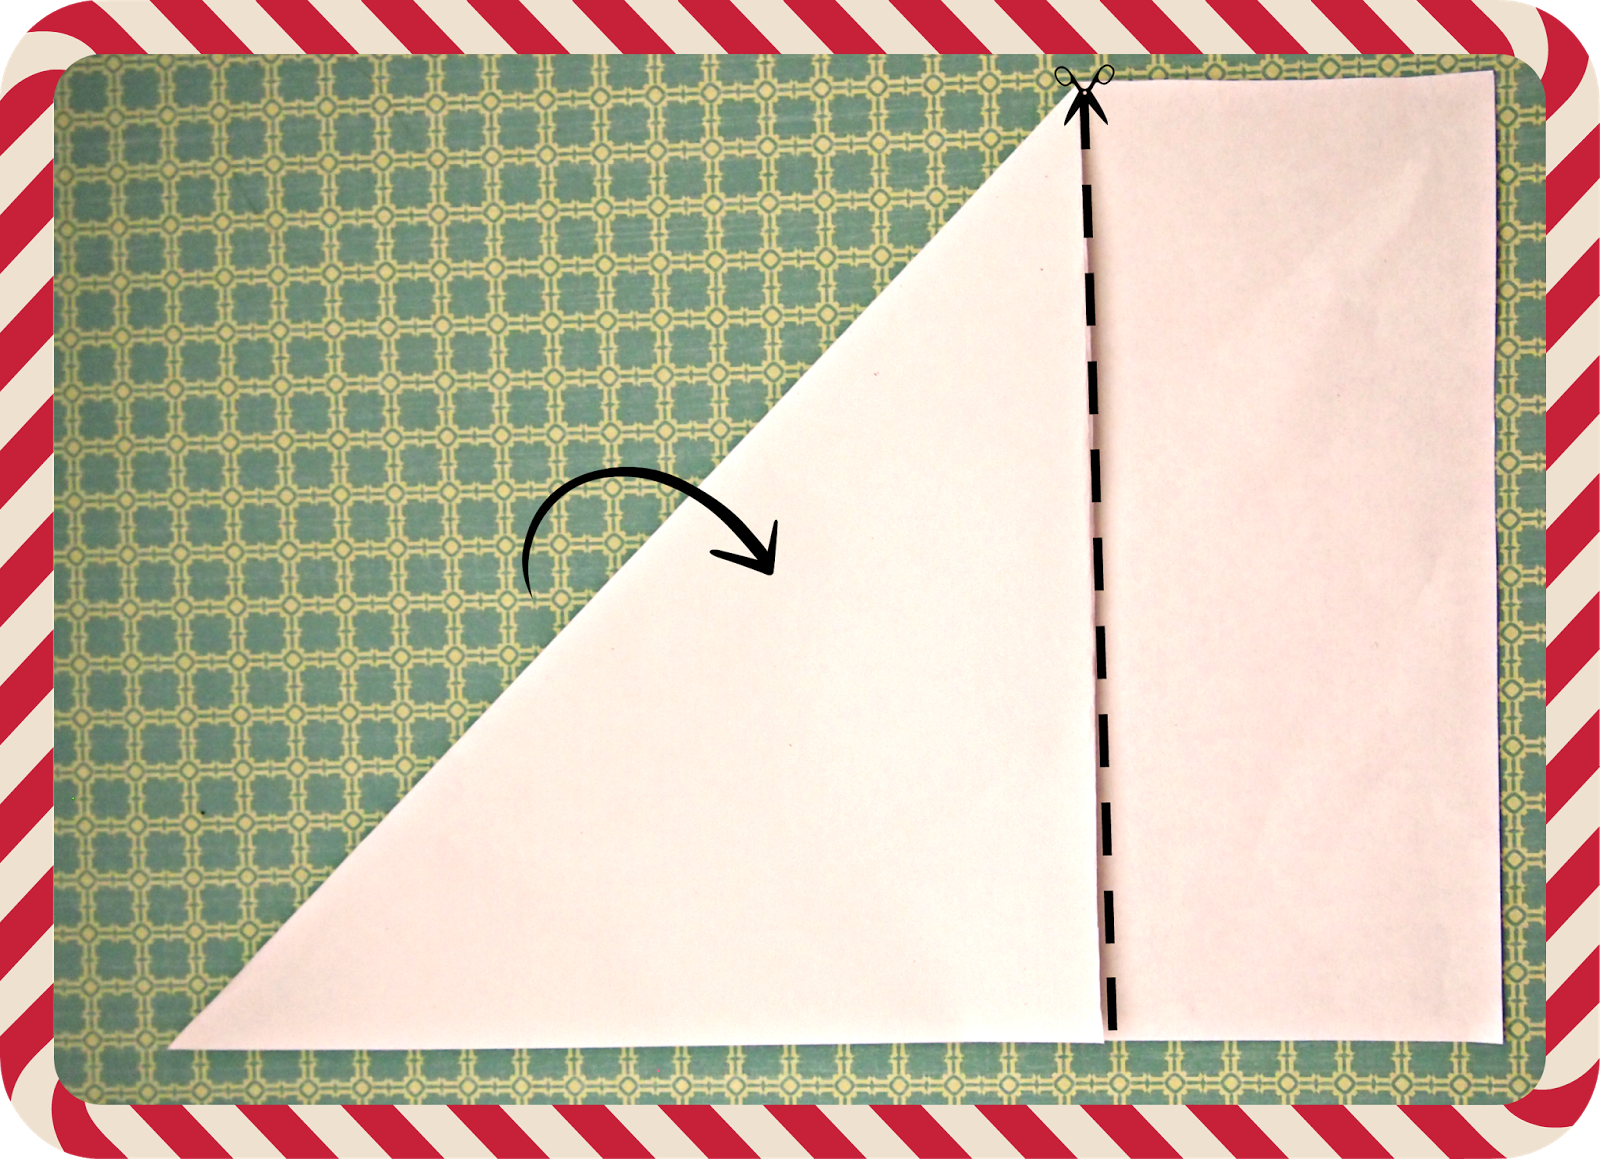
You then want to fold down the top half of the paper to form a triangle and cut off the excess paper at the bottom like in the picture above.

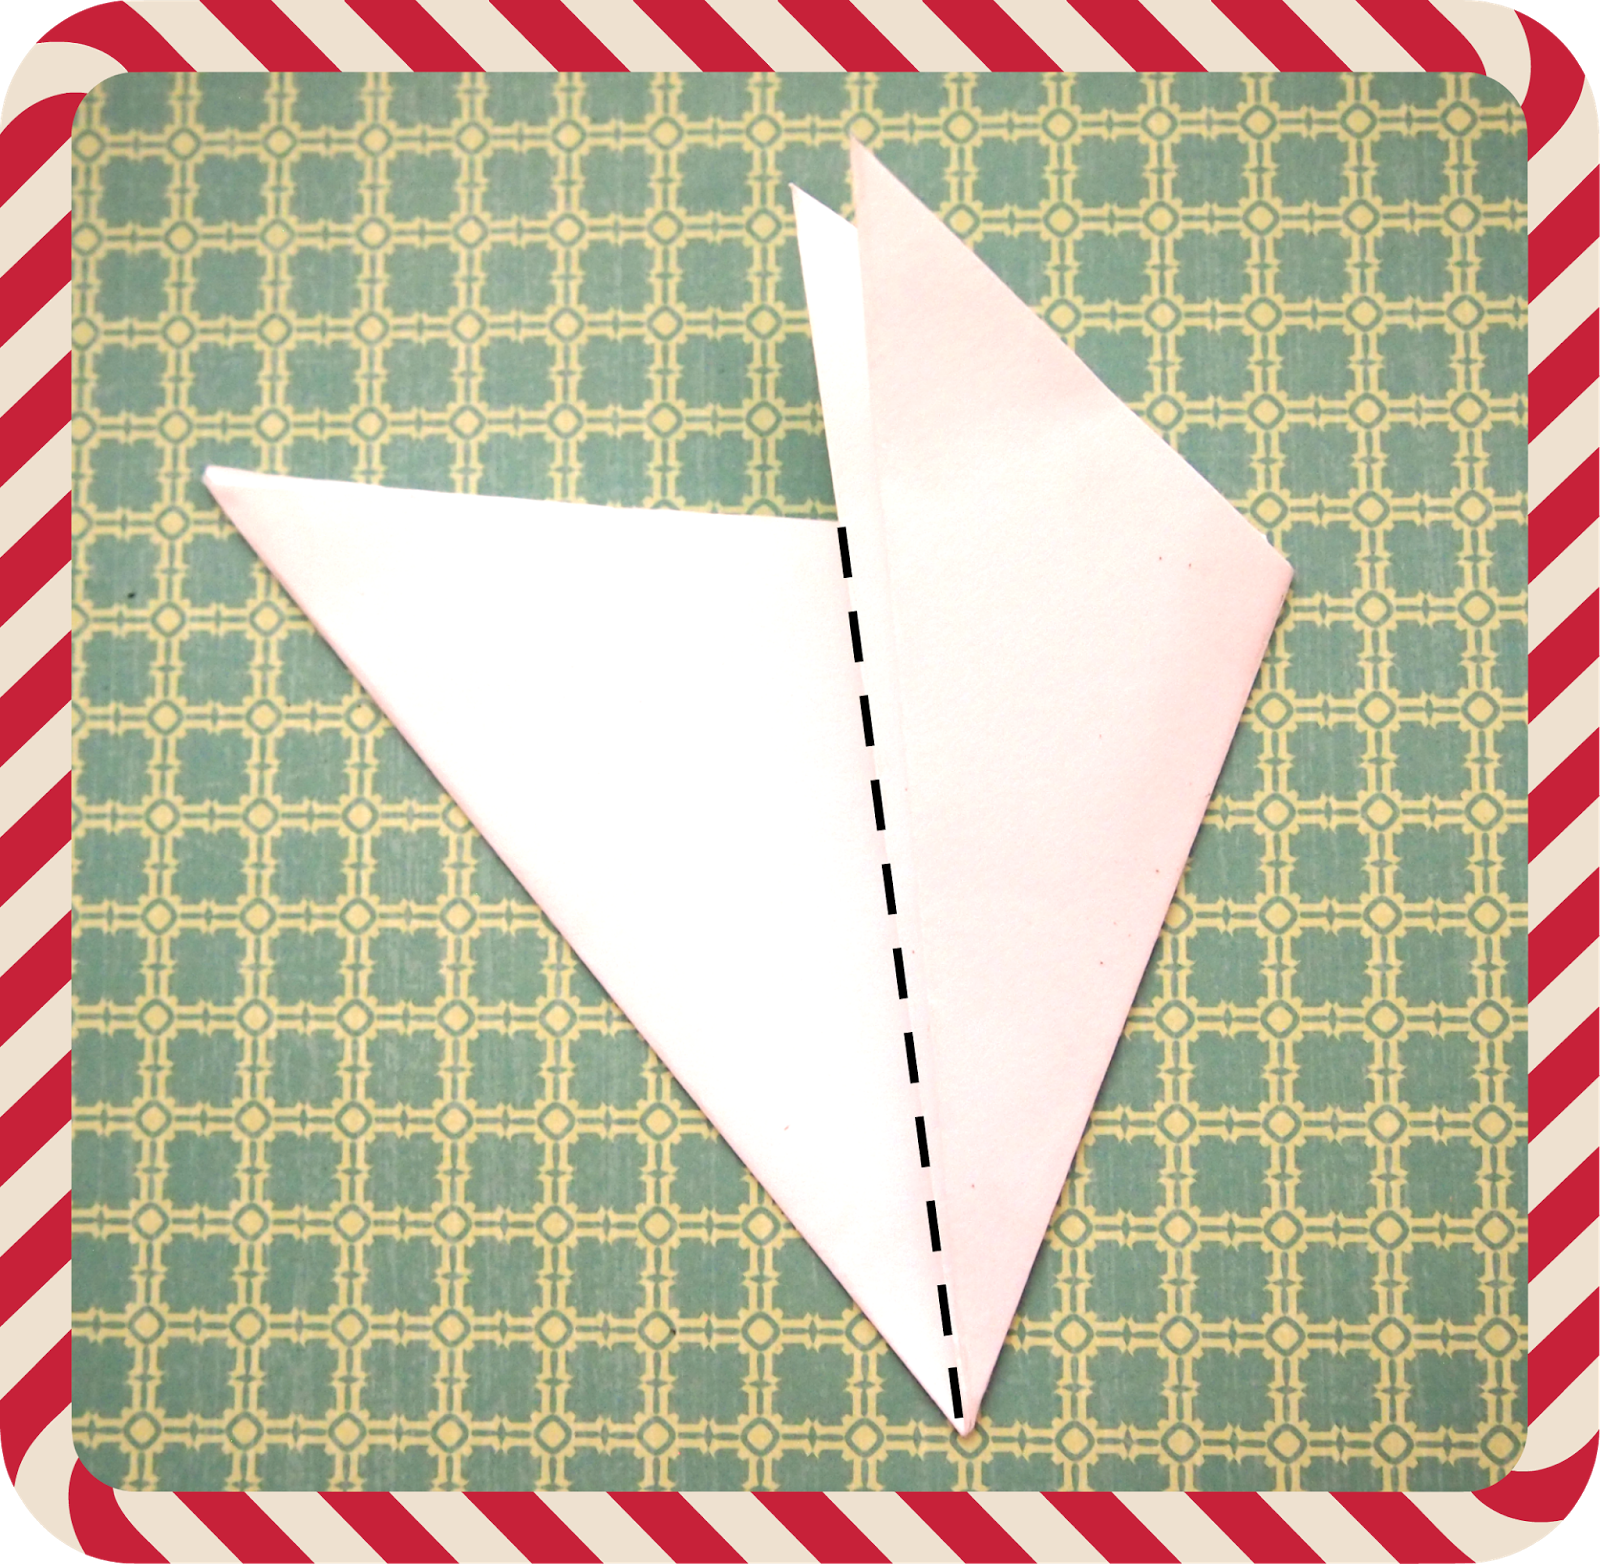
Once you've got your folded in half triangle, here comes the tricky bit, fold it in half again.

Now you should have a triangle that been folded in half twice. The next thing you want to do is fold that triangle into thirds, along the lines in the picture above.

Once you've folded the triangle into thirds, cut off the excess paper along the top (picture above) so you end up with a triangle shape (picture below).

Now the fun bit,

From this triangle you can cut your design. When you cutting out your design make sure you don't cut straight across, obviously that will result in your snowflake being presented in separate little bits of paper and we don't want that. The design above is to create the snowflake at the top of the blog post.

Cut out the shaded areas shown above so you remain with the snowflake pattern below.

Fold it out and Tad-ah! You have created yourself a masterpiece.
Here are some more to get you inspired and coming up with some more crazy designs,


Merry Chistmas!
Zoë xo
No comments:
Post a Comment