Friday, 18 March 2016

Soft Double Choc Brownie Cookies

Every now and then I'll be hit with a super strong craving that I can't resist. Whether it be, a margarita pizza, a milkshake, a pickle or a cheese toastie, if I want it badly enough I have to have it.  About a week ago I found myself longing for a warm batch of soft, oozy chocolate biscuits and, of course, began rapidly googling to find the recipe best suited to my desires. To my delight I stumbled upon a recipe for soft batch double chocolate chip cookies on www.justsotasty.com , whipped up a batch and drifted off into chocolate cookie heaven. These chocolate chip biscuit/ brownie hybrid cookies are so decadent but soooo good I just had to share them.


For your Double Choc Brownie Cookies you will need:


  • 145g of softened butter 
  • 3/4 cup brown sugar 
  • 1/4 cup caster sugar 
  • 1 egg
  • 1 tsp of vanilla
  • 1 cup of plain flour 
  • 2/3 of dark cocoa 
  • 1/2 tsp baking powder 
  • 1 cup of chocolate chips 
Method 
  1. Cream butter and sugar together until pale and creamy, then add egg and vanilla and beat until combined.
  2. Sift in dry ingredient and mix on a low speed until combined.
  3. Add in chocolate chips and mix thoroughly. 
  4. Cover bowl and refrigerate for 2hrs or until firm enough to role. If you're impatient like me, you can pop you bowl in the freezer for half the amount of time. This is an important step as this is what makes you cookies, soft and brownie-ish, if you don't refrigerate your dough your cookies will go splat in the oven (something we would like to avoid).
  5. Once you dough is chilled, roll out tablespoonfuls of dough into balls and place them on a lined baking tray. Bake at 180 degrees Celsius for 10-12 minutes or until the cookies are just set.
  6. allow to cool for a few minutes and enjoy! 

Zoë xx
0

Monday, 1 February 2016

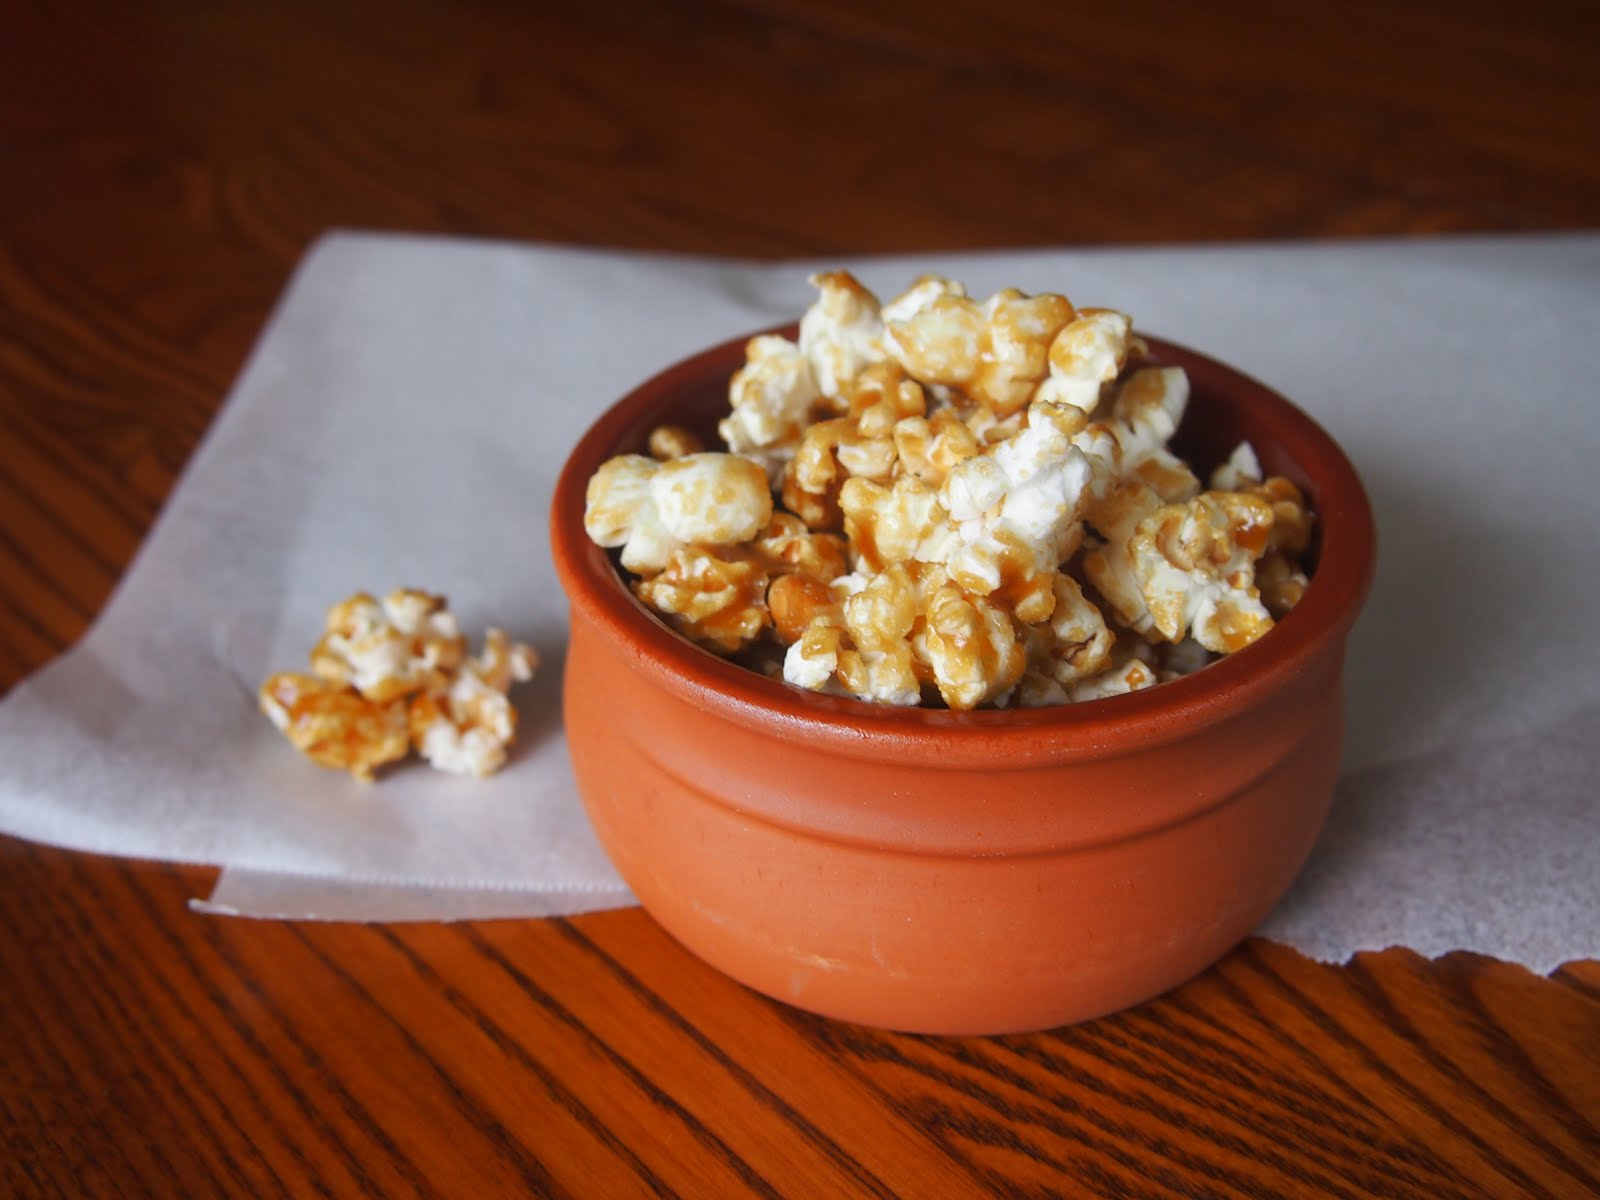
The Best Caramel Popcorn


This caramel popcorn recipe is the best and worst thing that ever happened to me. The best because it means my Friday night sugar cravings can be sated within mere minutes and the worst, well because by Friday night sugar cravings I mean Monday, Tuesday, Wednesday, Thursday and Friday night sugar cravings... whoops. To put it simply, this caramel popcorn is so irresistibly scrumptious that it takes one batch to become addicted. So precede with caution because I am about to corrupt you. 

  • 100g butter 
  • 1/4 cup of golden syrup
  • 1 cup of caster sugar 
  • 1 tsp of salt 
  • 1/3 cup of popping corn  

  1. Pop your corn. I use an electric air popper but if you don't have one you can cook your popcorn by heating a small amount of oil in a pot. Once the oil is hot add you corn and take off the heat once popping slows. Once your corn is popped lay it out on a tray ready to pour your caramel over. 
  2. add your butter, golden syrup, caster sugar and salt to a small pot and melt on a high heat. continue to stir your caramel until it boils. It's important when making your caramel that you cook it for long enough. Not long enough and it wont set, too long and it will burn - neither are desirable. You want to cook your caramel until it boils viciously and changes to a dark richer colour (see above). Then quickly take off the heat, pour over your popcorn and combine until all the popcorn is covered. 
  3. Place in fridge and allow to cool.


Enjoy!

Zoe xx

0

Thursday, 22 October 2015

Rice Bubble Marshmallow Slice

If your in need for a quick and mighty delicious snack this three ingredient rice bubble slice is the perfect recipe. 


You will need:

- 1 280g packet of Marshmallows
- 70g of butter
- 4 cups of rice bubble


Steps:

1. Melt butter in a pan
2. Once melted add in marshmallow and stir until completely melted
3. Add in rice bubble and stir until consistent
4. Turn out into line pan and press flat with the back of a spoon
5. refrigerate until set


Enjoy!

Zoë xx

0

Monday, 5 October 2015

A Holiday in Noosa


In the first week of the holidays my family and I went on a little holiday to Noosa on the sunshine coast. It is one seriously relaxing place with some unbelievable food. In the five days we were there we managed to do A LOT including visiting the national park, checking out Peregian beach, Hastings Street, the Eumundi markets and a collection of little side towns like Kenilworth, Imbul and Cooroy, which had the most beautiful botanical gardens. Above all, my primary judging criteria when visiting a new place has to be the quality of food I can have the great pleasure to sample while I'm there. It would have to be the understatement of the century to say that Noosa's resurants and cafes like Zachary's, The Lazy River Cafe and LowKey fully exceded my criteria. All in all it was wonderfully relaxing and just the right kind of excapism I needed to recharge before my last term of high school. If your from the south east, this is definitely a place you should check out.


Zoë xx
0

Sunday, 20 September 2015

What I got for my Birthday 2015

Hello everyone,


It was recently my birthday and as a result, I received an abundance of lovely gifts from some lovely people. In an attempt to prolong the birthday hysteria and make the celebrations last an embarrassing length of time, I took some photos, wrote a few comments and compiled a birthday present blog post for your hungry eyes to browse. Enjoy!

These adorable cupcake cases.

This gorgeous watch from fossil - my dreams have come true.


not to mention the super cool tin case it comes in.


This super pretty and delicate flower ring from Pandora.


This is a really cool set of free trade incense sticks that you burn in this little tiny bowl. 


continuing with my love of tiny things, this is a matchbox sized message in a bottle kit in case I get shipwrecked - a necessity. 


Since I was a kid, I've always wanted a leather bound secret little book that I could write or draw things in - now I have one and I couldn't be more chuffed.

This is an oil and wax burner in a very nice colour. 


I have a bit of a thing for teacups and this little pale blue Maxwell Williams 'blush' range cup is the newest addition to my collection. 

These adorable little sterling silver elephant earrings - elephants and jewelry in one, how could you complain?

and this sterling silver necklace with a Virgo symbol pendant

this yummy Lush soap in the scent 'Karma'

This adorable peter pan collar dragonfly dress from princess highway

A rather lovely floral skirt from dotti.


A colouring in book with quotes on each page. You are never too old to colour in. 


Two lovely journals both of which I have already written in.

The infernal devices series from Cassandra Clare - a great holiday read.

Yum


and last but not least, this amazing green satchel bag from princess highway.


Hope you enjoyed :)


Zoë xx

0

Sunday, 1 February 2015

DIY Butterfly Shadow Box Paint Chip Art

Hello Everyone! I've officially started year twelve, I went back to school last week, hence why there was no blog post. But I'm back this week with a DIY, a 'paint chip art' take two! Since the first blog post I did, 'DIY: paint chip art', was so well received I thought I'd do another one. Instead this time I decided to use paint chips to create some really cool 3D shadow box art. I hope you're inspired to get creative with this DIY and to anyone else who just started year twelve, Good Luck! We can get through it together! :)


First of all you're going to need a stack of paint chips in your desired colour. The large square paint chips work better for this DIY cause you can get more shapes out of one sheet. Also I'd recommend getting a couple of each colour, just so you've got some as backups.


The next thing you need to do is fold your paint chip in half and draw a simple butterfly design on the fold. Cut out your shape so when you unfold it you have a butterfly. :)


Repeat this another three times by tracing the same half shape on the fold. You should end up with three close-to-identical butterfly shapes.


 Take two of the butterfly shapes and glue one wing from each butterfly to the other so you end up with something similar to the picture below.


Glue the third butterfly on the other wing so you end up with something similar to the pictures below.


Repeat the same steps to create additional butterflies.


Arrange the butterflies so the sit how you want them to once they're inside the frame and glue them in place, onto a sheet of card or normal printer paper.


 cut out the paper so it will fit the same size as the frame.


Frame you're creation and you're done!

 Happy DIYing!


Zoë xx
0

Sunday, 18 January 2015

FRIENDS Peephole frame DIY

Hello everyone! If you're not already aware of my unhealthy obsession with Friends this weeks blog post will be sure to illustrate the extremity of it for you. I have wanted to make a replica of Monica's yellow peephole frame for a very long time now but I've never really had a cause. Basically, an opportunity presented itself and I, of course, seized it. I will admit it did take me a week to get to the final product. But don't fret more that 90% of it was waiting for the paper mache to dry.


To create Monica's peephole frame you will need:

  • newspaper
  • cheap paper towel
  • PVA glue 
  • water 
  • some old paint brushes
  • scissors
  • Yellow,brown and Gold paint (gold paint is optional, just use whatever works for you)

Step One:

Print out an A4 size version of the actual peephole frame to use as a template. I got my template here from www.intructables.com . Also this would be the point at which you put friends on to watch while creating your masterpiece. 

Step Two:

Mix some PVA glue with a small amount of water just to thin the glue a little bit so its easier to paint on. Lay out a sheet of newspaper and use and old paint brush to paint the PVA glue and water mixture all over the sheet. Then roll up the newspaper so that its about an inch thick. Layout your strips of rolled up newspaper ontop of the template so it resembles something like this:


You will have to leave this for a couple of days to completely dry out before you do the next step. Be patient otherwise all your hard-work so far will be for nothing. :)

Step Three:

Once your 'frame' has dried you're ready to paper mache over the top. The aim is to make the gaps appear filled in but apply the mache so it dips a little in the middle - this makes sure the swirls and outlines are still defined. You need some cheap paper towel - newspaper mache is probably too harsh. To start off layer together a few sheets of paper towel and drape it between sections of the frame. Build up the layers of paper mache until the entire frame is covered. Once your done your frame should look like this:


Leave this to dry out completely before doing the next step. If you want to speed up the drying process just use a hairdryer (but don't get too close haha).

Step Four:

You're ready to paint wooh! First paint the entire thing in a yellow as close to the original colour. Then go back in and add shading around the swirls and curves to add dimension. 


I used a mixture of gold, brown and yellow to shade. I like the gold because it gave a kind of bronzed effect. 


And this is your final product!


I super happy with how mine turned out and it was actually way easier to make that I thought it would be. Have fun creating your masterpiece!

Zoë xx

0